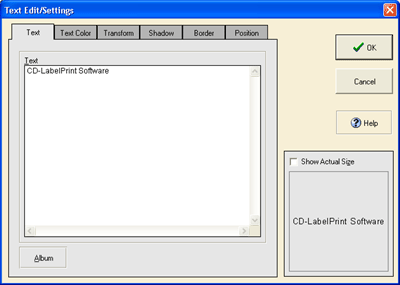
On the toolbar in the Label Edit view, click ![]() button, or on the Text menu, select Text. To edit the
text placed on the label, double click the text. Add Text (Text
Edit/Settings) dialog box appears.
button, or on the Text menu, select Text. To edit the
text placed on the label, double click the text. Add Text (Text
Edit/Settings) dialog box appears.
Enter text.

"CD-LabelPrint Software" is entered in the text input field.
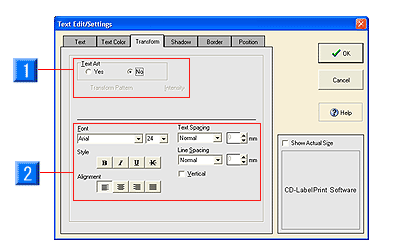
To change the font size and style, select Transform tab.

- Text Art: Transforms the text. For details, refer to "Functions > Editing Objects > Text > Decorate text".
- Text Settings: Provides the same edit functions as the
functions on the
toolbar in the Label Edit view.
When you have finished editing the text, click the OK button.
The edited text will be placed on the label.
* You can choose other various edit functions. For details, refer to "Functions > Editing Objects > Text".