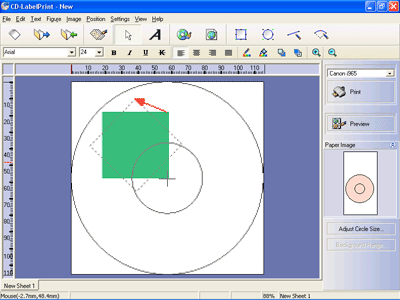
When an object is selected, place the cursor on a green dot displayed in
the upper right corner and the lower left corner. The cursor changes to ![]() . Drag and drop to a location you like, and the object rotates.
. Drag and drop to a location you like, and the object rotates.
* Follow the same steps while pressing the Shift key. The object rotates by 45°.

To rotate an object automatically, select an object, and select Rotate on
the Position menu. The object rotates by 90°.
* You can also select Rotate on the
right-click menu in the Label Edit view.
* You can change the rotate angle in the Position tab options in
the object settings.
* Grouped objects, lines, and arcs cannot be rotated.