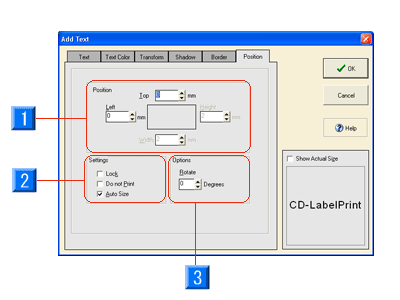
If you want to specify the details of the object position, or if you do not want to print an object placed as a marker, use the settings shown below.
Select the Position tab of an object. Following window appears.
* Some items may differ depending on the object. The figure below is Add Text dialog box.

- Position: You can specify the position of the object by values.
- Settings:
Lock: Locks the selected object so that it does not move.
Do not Print: Does not print the object being edited. The object is displayed in the Label Edit view.
Auto Size: Optimizes the text input range. However, this item cannot be used for deformed text. - Rotate: Rotates the object.