The Administrator Tool is used by the person who has administrator privileges on this computer. This tool is used to configure common (shared) profiles, pre-logon profiles, and persistent connection profiles.The Administrator Tool can also be used by an Information Technology department to configure user settings within the Intel(R) PROSet/Wireless software and to create custom install packages to export to other systems.
The Administrator Tool is located on the Tools menu. It must be selected during installation of the Intel PROSet/Wireless software or the feature is not displayed in the Tools menu.
Users cannot modify Administrator settings or profiles unless they have the password for this tool. When you first access the Administrator Tool, you are required to enter a password. The password must not exceed 100 characters. Null passwords are not allowed.
To change the existing password:
The Administrator Packages are used to save administrative profiles and other settings. You can copy or send this self-extracting executable to clients on your network. When the executable runs, the contents are installed and configured on the destination computer.
To create a new package:
NOTE: You can also select Save Package on the Administrator Tool File Menu to save the package.
To edit a package:
NOTE: You can also select Open Package on the Administrator Tool File menu to edit an Administrator Package.
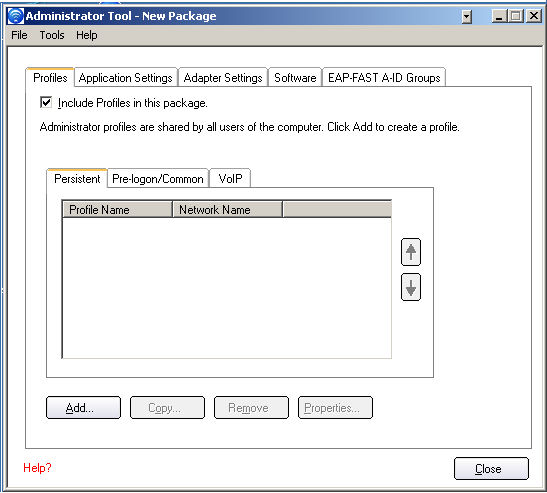
Administrator Profiles are owned and managed by the network administrator or the administrator of this computer. These profiles are common or shared by all users on this computer. However, end users cannot modify these profiles. They can only be modified from the Administrator Tool, which is password protected.
There are three types of Administrator Profiles: Persistent, Pre-Logon/Common and Voice over IP (VoIP).
Persistent profiles are applied at boot time or whenever no one is logged on the computer. After a user logs off, a Persistent profile maintains a wireless connection either until the computer is turned off or a different user logs on.
Persistent Connect key points:
NOTE: Intel PROSet/Wireless supports machine certificates. However, they are not displayed in the certificate listings.
To create a Persistent Profile:
Pre-Logon/Common profiles are applied prior to a user log on. If Single Sign On support is installed, the profile is applied and connection is made prior to the the Windows log on sequence (pre-logon).
If Single Sign On support is not installed, the profile is applied once the user session is active.
Pre-logon/Common profiles always appear at the top of a the Profiles list. A user can still prioritize their own profiles that they have created but they cannot reprioritize Pre-logon/Common Profiles. Since these profiles appear at the top of the profiles list, Intel PROSet/Wireless automatically attempts to connect to the Administrator profiles first before any user created profiles.
NOTE: Only administrators can create or export Pre-Logon/Common profiles.
Pre-Logon Connect key points are:
Pre-Logon support is installed during a Custom install of the Intel PROSet/Wireless software. Refer to Install and Uninstall the Software for more information.
NOTE: If the Single Sign On or Pre-Logon Connect features are not installed, an administrator is still able to create Pre-Logon/Common profiles for export to a user's computer.
The following describes how the Pre-Logon Connect feature functions from system power-up. The assumption is that there is a saved profile with valid security settings marked with "Use Windows Logon user name and password" that are applied at the time of Windows log on.
NOTE: A user certificate can only be accessed by a user that has been authenticated on the computer. Therefore, a user should log onto the computer once (using either a wired connection, alternate profile or local log in) before using a pre-logon profile that authenticates with a user certificate
When a user logs off, any wireless connection is disconnected and a persistent profile (if one is available) is applied. Under certain circumstances it is desirable to maintain the current connection (for example, if user specific data needs to be uploaded to the server post-log off or when roaming profiles are used).
Create a profile which is marked as both pre-logon and persistent to achieve this functionality. If such a profile is active when the user logs off, the connection is maintained.
To create a Pre-Logon/Common Profile:
An administrator can select the user name format for the authentication server.
The choices are:
- user (default)
- user@domain
- user@domain.com
- DOMAIN\user
NOTE: If a Persistent connection was already established, a Pre-Login/Common profile is ignored if the profile is configured with both Pre-Logon/Common and Persistent connection options.
Intel PROSet/Wireless software supports VoIP third-party soft-phone applications.
Third party VoIP applications support Voice Codecs. Codecs are used to encode voice for transmission across IP networks. Codecs generally provide a compression capability to save network bandwidth.
Intel PROSet/Wireless software supports the following International Telecommunications Union (ITU) codec standards:
Codec |
Algorithm |
Data Rate (Kbps) |
Comments |
ITU G.711 |
PCM (Pulse Code Modulation) |
64 |
G.711 with mu-law used in North America and Japan, while G.711 with A-law used in the rest of the world. |
ITU G.722 |
SBADPCM (Sub-Band Adaptive Differential Pulse Code Modulation) |
48, 56 and 64 |
|
ITU G.723 |
Multi-rate Coder |
5.3 and 6.4 |
|
ITU G.726 |
ADPCM (Adaptive Differential Pulse Code Modulation) |
16, 24, 32, and 40 |
|
ITU G.728 |
LD-CELP (Low-Delay Code Excited Linear Prediction) |
16 |
|
ITU G.729 |
CS-ACELP (Conjugate Structure Algebraic-Code Excited Linear Prediction) |
8 |
|
An administrator can create profiles that use pre-existing VoIP profiles to configure various codec data rates and frame rates to improve voice quality in VoIP transmissions.
To create a VoIP profile:
NOTE: Ensure Voice over IP is not disabled in the Administrator Tool Application Settings. It is enabled by default.
Codec |
Usage |
Frame Rate |
|---|---|---|
|
|
|

An Administrator can determine which order Administrator profiles are placed in the Administrator Tool's Profiles list.
An administrator can select which level of control that users have over their wireless network connections.
To configure Application Settings:
| Name |
Description |
|---|---|
Select Add 802.11a Radio On/Off Selection to allow a user to turn on or off the 802.11a radio on their computer. This adds the 802.11a Radio Off control to the Taskbar menu and the Intel PROSet/Wireless main window on a user's computer. Once this feature is installed on a user's computer, follow the instructions below to turn on or off the 802.11a radio control. To turn off the 802.11a Radio:
To turn on the 802.11a Radio:
NOTE: This option is available only for wireless adapters that support 802.11a, 802.11b and 802.11g. This feature is not installed through an Administrator Package when a user's computer has an Intel(R) PRO/Wireless 3945BG Network Connection or an Intel(R) PRO/Wireless 2200BG Network Connection. |
|
802.1x Authentication
|
Enable a user to create or connect to profiles that support different 802.1x authentication EAP types. Select which 802.1x authentication EAP types you want enabled on a user’s computer: MD5, EAP-SIM, LEAP, TLS, TTLS, PEAP, EAP-FAST. |
Administrator Tool |
Disable access to the Administrator Tool on a user’s computer. |
Application Auto Launch |
Select to start a batch file, executable file, or script automatically when a specific profile connects to the network. For example, start a Virtual Private Network (VPN) session automatically whenever a user connects to a wireless network. |
Application On Radio Toggle |
Enables a third-party application to disable the Intel PROSet/Wireless Wireless On or Wireless Off switch. |
CCXv4 |
Select Enable CCSv4 to Enable Cisco Compatible Extensions, version 4 (CCXv4) features for EAP-FAST profiles. NOTE: The EAP-FAST A-ID (Authority Identifier) Groups feature in the Administrator Tool is unavailable if CCXv4 is not enabled. Select which of the following prompts to enable or disable on a user's computer for EAP-FAST PAC provisioning: Turn on prompt and warnings for unauthenticated provisioning: Option to turn off prompts and warnings for PAC auto-provisioning if there is no PAC or there is no PAC that matches the A-ID sent by the server that it is connected to. Turn off prompts when switching default server (A-ID): Option to turn off prompts when a client encounters a server that has provisioned a PAC before but is not currently selected as the default server. Turn off unauthenticated provisioning after PAC is provisioned: Option to turn off auto-provisioning automatically after a PAC for that A-ID has been provisioned. NOTE: This feature is not installed through an Administrator Package when a user's computer has an Intel(R) PRO/Wireless 3945BG Network Connection, an Intel(R) PRO/Wireless 2915ABG Network Connection, or an Intel(R) PRO/Wireless 2200BG Network Connection. |
Cache Credentials |
Select to save credentials after a user logs on. If the wireless connection temporarily disconnects, the saved credentials are used upon reconnection. The credentials are cleared when the user logs off. NOTE: if cleared, The Prompt each time I connect option is unavailable when creating profiles |
Device to Device (ad hoc) |
Enable or disable whether a user is able to either create ad hoc profiles or join ad hoc networks. Select one of the following to enable or disable whether the user can connect to device to device networks:
Select to either allow a user to configure profiles with device to device (ad hoc) settings or prevent configuration of device to device (ad hoc) profiles.
To remove the Device to device (Ad hoc) operating mode from the Profile Wizard General Settings, select both Disable device to device networking and Hide device to device application settings. This prevents a user from creating profiles that support Device to device (Ad hoc) network. |
Import and Export |
Select to import to or export profiles from a user’s computer. Enable permits auto import of user profiles when copied to an auto import folder. |
Message On Radio Toggle |
Enables a third-party application to notify a user that the Intel PROSet/Wireless radio is either on or off. |
Microsoft Windows XP Coexistence |
Select Enable Microsoft Wireless Zero Configuration and Intel PROSet/Wireless to coexist on this system. Enable this option to allow Microsoft Wireless Zero Configuration and Intel PROSet/Wireless to exist together on this system. When you select this option, you prevent Microsoft Windows XP Wireless Zero Configuration Service from being disabled when Intel PROset/Wireless is enabled. |
Pre-Logon Cisco Mode |
Enable Cisco Mode during a pre-logon connection. Cisco access points have the capability to support multiple wireless network names (SSIDs) but only broadcast one. In order to connect to such an access point, an attempt is made to connect with each profile. This is referred to as Cisco Mode. NOTE: The pre-logon connection may take longer to connect. |
Profile Connectivity |
Select the profile connectivity level on a user’s computer? Disable Intel Profile Switching. Users are only able to connect with the first Pre-Logon (Common) profile or connect with Pre-Logon profiles only.
|
Security Level |
Select the security level on a user's computer? Users are able to connect to profiles only with this security level.
|
Single Sign On |
Select which Administrator Profile types are enabled on a user computer?
|
Enables a third-party software to use the VoIP application on a user's computer. The default setting enables this feature. |
|
Select which Wi-Fi manager controls a user’s wireless connections. Use either the previous logged on user’s Wi-Fi manager or allow each user to select their preferred Wi-Fi manager.
|
|
Close |
Closes the Administrator Tool. |
Help? |
Provides help information for this page. |
To configure Adapter Settings:
Name |
Description |
|---|---|
Ad Hoc Channel |
There is no need to change the channel unless the other computers in the ad hoc network use a different channel from the default channel. Value: Select the allowed operating channel from the list.
|
Ad Hoc Power Management |
Set power saving features for Device to Device (ad hoc) networks.
NOTE: This feature is not installed through an Administrator Package when a user's computer has an Intel(R) PRO/Wireless 3945BG Network Connection, an Intel PRO/Wireless 2915ABG Network Connection, or an Intel PRO/Wireless 2200BG Network Connection. |
Ad Hoc QoS Mode |
Quality of Service (QoS) control in ad hoc networks. QoS provides prioritization of traffic from the access point over a wireless LAN based on traffic classification. WMM (Wi-Fi MultiMedia) is the QoS certification of the Wi-Fi Alliance (WFA). When WMM is enabled, the adapter uses WMM to support priority tagging and queuing capabilities for Wi-Fi networks.
NOTE: This feature is not installed through an Administrator Package when a user's computer has an Intel(R) PRO/Wireless 3945BG Network Connection, an Intel PRO/Wireless 2915ABG Network Connection, or an Intel PRO/Wireless 2200BG Network Connection. |
Mixed Mode Protection |
Use to avoid data collisions in a mixed 802.11b and 802.11g environment. Request to Send/Clear to Send (RTS/CTS) should be used in an environment where clients may not hear each other. CTS-to-self can be used to gain more throughput in an environment where clients are in close proximity and can hear each other. |
Preamble Mode |
Changes the preamble length setting received by the access point during an initial connection. Always use a long preamble length to connect to an access point. Auto Tx Preamble allows automatic preamble detection. If supported, short preamble should be used. If not, use long preamble (Long Tx Preamble). NOTE: This feature is not installed through an Administrator Package when a user's computer has an Intel PRO/Wireless 3945ABG Network Connection. |
Power Management |
Power Management: Allows you to select a balance between power consumption and adapter performance. The wireless adapter power settings slider sets a balance between the computer's power source and the battery. Select a balance between power consumption and adapter performance. Select one of the Power Saving Mode levels:
NOTE: Power consumption savings vary based on infrastructure settings. |
Roaming Aggressiveness |
This setting allows you to define how aggressively a wireless client roams to improve connection to an access point. Click Use default value to balance between not roaming and performance or select a value from the list.
|
Throughput Enhancement |
Change the value of the Packet Burst Control.
|
Transmit Power |
If you decrease the transmit power, you reduce the radio coverage. Default Setting: Highest power setting Values:
NOTE: The optimal setting is for a user to always set the transmit power at the lowest possible level still compatible with the quality of their communication. This allows the maximum number of wireless devices to operate in dense areas and reduce interference with other devices that this radio shares radio spectrum with. NOTE: This setting takes effect when either Infrastructure or Ad hoc mode is used. |
Select which band to use for connection to a wireless network:
NOTE: These wireless modes (modulation types) determine the discovered access points displayed in the Wireless Networks list. |
|
OK |
Saves settings and return to the previous page. |
Close |
Closes the page and cancels any changes. |
Help? |
Provides help information for this page. |
Select which of the Intel PROSet/Wireless applications are installed on a user's computers.
NOTE: If you plan to use Novell(R) Client(TM) for Windows, it should be installed prior to installation of the Intel PROSet/Wireless software. If Intel PROSet/Wireless is already installed, you should remove it prior to installation of Novell Client for Windows.
NOTE: This feature is unavailable if CCXv4 is not selected in the Administrator Tool Application Settings
An Authority Identifier (A-ID) is the radius server that provisions Protected Access Credential (PACs) A-ID groups. A-ID groups are shared by all users of the computer and allow EAP-FAST profiles to support multiple PACs from multiple A-IDs.
The A-ID groups can be pre-configured by the administrator and set up through an Administrator Package on a user's computer. When a wireless network profile encounters a server with an A-ID within the same group, it uses this PAC without a prompt to the user.
To add an A-ID Group:
If the A-ID group is locked, then additional A-IDs cannot be added to the group.
To add an A-ID to an A-ID group.
If you do not have any certificates for EAP-TLS (TLS) or EAP-TTLS (TTLS) you must obtain a client certificate to allow authentication.
Certificates are managed from either Internet Explorer or the Microsoft Windows Control Panel.
Microsoft Windows XP and Microsoft Windows 2000: When a client certificate is obtained, do not enable strong private key protection. If you enable strong private key protection for a certificate, you need to enter an access password for the certificate every time this certificate is used. You must disable strong private key protection for the certificate if you configure the service for TLS or TTLS authentication. Otherwise, the 802.1x service fails authentication because there is no logged in user to provide the required password.
Notes about Smart Cards
After a Smart Card is installed, the certificate is automatically installed on your computer and is chosen from the personal certificate store and root certificate store.
Step 1: Obtain a certificate
To allow TLS authentication, you need a valid client certificate in the local repository for the logged-in user's account. You also need a trusted CA certificate in the root store.
The following information provides two methods for obtaining a certificate:
If you do not know how to obtain a user certificate from the CA, consult your administrator for the procedure.
To install the CA on the local machine:
Use Microsoft Management Console (MMC) to verify that the CA is installed in the machine store.
NOTE: If this is the first certificate you have obtained, the CA first asks you if it should install a trusted CA certificate in the root store. This is not a trusted CA certificate. The name on the certificate is that of the host of the CA. Click Yes. You need this certificate for both TLS and TTLS.
To configure a profile with WPA authentication with WEP or TKIP encryption that uses TLS authentication:
NOTE: Obtain and install a client certificate, refer to Step 1 or consult your administrator.
Specify the certificate used by Intel PROSet/Wireless
- Use my smart card: Select if the certificate resides on a smart card.
- Use the certificate issued to this computer: Click Select to choose a certificate that resides in the machine store.
- Use a user certificate on this computer. Click Select to choose a certificate that resides on this computer.
Certificate Issuer: The server certificate received during TLS message exchange must be issued by this certificate authority (CA). Trusted intermediate certificate authorities and root authorities whose certificates exist in the system store are available for selection. If Any Trusted CA is selected, any CA in the list is acceptable. Click Any Trusted CA as the default or select a certificate issuer from the list.
Server or Certificate Name: Enter the server name.
The server name or domain to which the server belongs, depends on which of the two options below has been selected.
Server name must match the specified entry exactly: When selected, the server name must match exactly the server name found on the certificate. The server name should include the complete domain name (for example, Servername.Domain name).
Domain name must end with the specified entry: When selected, the server name identifies a domain, and the certificate must have a server name that belongs to this domain or to one of its subdomains (for example, zeelans.com, where the server is blueberry.zeelans.com). NOTE: These parameters should be obtained from the administrator.
Notes about Certificates: The specified identity should match the Issued to identity in the certificate and should be registered on the authentication server (for example, RADIUS server) that is used by the authenticator. Your certificate must be valid with respect to the authentication server. This requirement depends on the authentication server and generally means that the authentication server must know the issuer of your certificate as a Certificate Authority. Use the same user name you used to log in when the certificate was installed.