A profile is a saved group of network settings. Profiles are displayed in the Profile List. Profiles are useful when moving from one wireless network to another. Different profiles can be configured for each wireless network. Profile settings include the network name (SSID), operating mode, and security settings.
A profile is created when you connect to a wireless network.
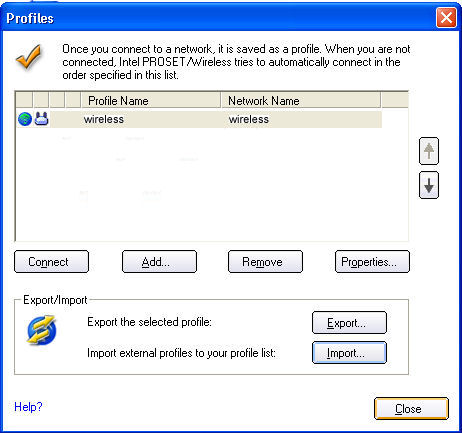
The Profile Management Wizard guides you through the settings required to connect with the wireless network. At completion, the profile is saved and added to the Profiles list. Since these wireless settings are saved, the next time you are in range of this wireless network you are automatically connected.
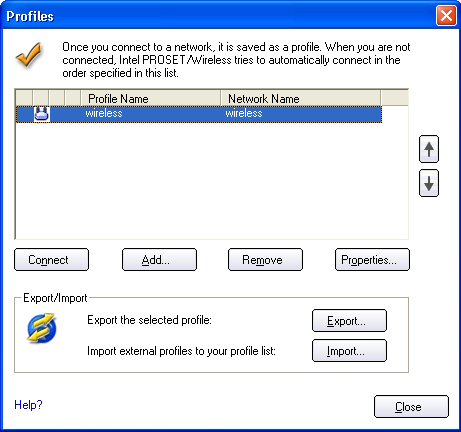
The profile list displays a list of existing profiles. When you come in range of a wireless network, Intel PROSet/Wireless scans the Profile List to see if there is a match. If a match is found, you are automatically connected to the network.
The network profile status icons indicate if the adapter is associated with a network, the type of operating mode being used, and if security encryption is enabled. These icons display next to the profile name in the profile list.
Name |
Description |
|
Profiles are network settings that allow your wireless adapter to connect to a network access point (Infrastructure mode) or computer (device-to-device [Ad hoc] mode) which does not use an access point. |
||
Network Name |
Name of the wireless network (SSID) or computer. |
|
Connection Icons - The network profile status icons indicate the different connection states of the adapter with a wireless network, the type of operating mode being used, and if network security is being used. |
||
|
Blue circle: The wireless adapter is associated with an access point or computer (Ad hoc mode). If a profile has 802.1x security enabled, this indicates that the wireless adapter is associated and authenticated. |
|
|
Indicates Network (Infrastructure) mode. |
|
|
Indicates Device to Device (ad hoc) mode. |
|
Indicates an Administrator profile. |
||
|
The wireless network uses Security encryption. |
|
Arrows
|
Use the arrows to position profiles in a preferred order for auto-connection.
|
|
Connect |
Connect the selected profile for the wireless network. |
|
Create a new profile using the Profile Wizard. Refer to Create a New Profile for more information. |
||
Remove a selected profile from the Profile List. Refer to Remove a Profile for more information. |
||
Edit the contents of an existing profile. You can also double-click a profile in the Profile List to edit the profile. Refer to Edit an Existing Profile for more information. |
||
|
Export/Import: Import and export user-based profiles to and from the Profiles list. Wireless profiles can be automatically imported into the Profiles list. See Import and Export Profiles for more information. |
|
Close |
Closes the profile management window. |
|
When you are in range of a wireless network that has a matching profile you are automatically connected to that network. If a network with a lower priority profile is also in range you can force the connection to that lower profile. This is achieved from Intel PROSet/Wireless or from the Taskbar icon.
Manually connect to a profile from Intel PROSet/Wireless
Manually connect to a profile from the Taskbar
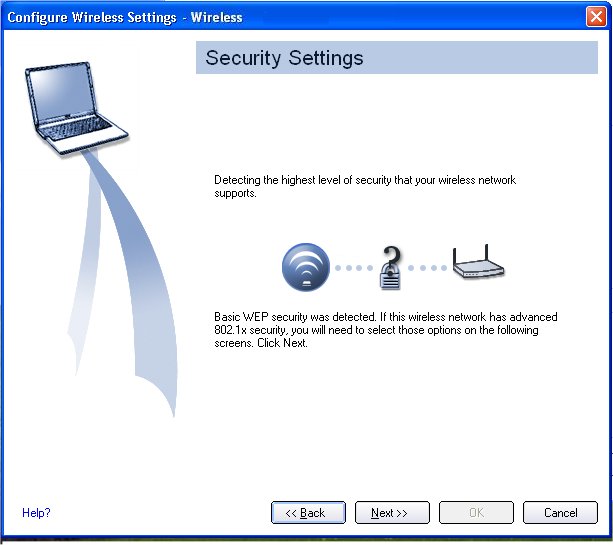
Select a network from the Wireless Networks list. Click Connect. The Create Wireless Profile Wizard guides you through the necessary steps to create a profile and connect to the network. During this process, the Wizard attempts to detect the appropriate security settings for you.
To create a new profile and connect to a wireless network:
Name |
Description |
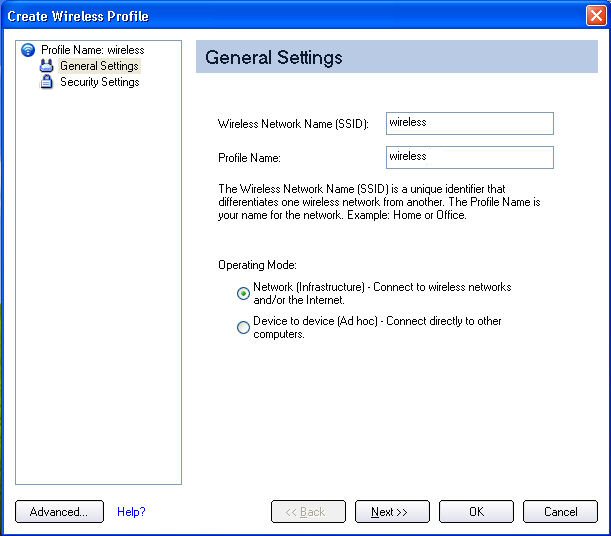
Name of the wireless network profile. When you configure a wireless network that was selected from the Wireless Networks list, the profile name is the same as the Wireless Network Name (SSID). This name can be changed to be more descriptive or customized for your personal use. Examples: My Office Network, Bob’s Home Network, ABC Company Network |
|
Name of the wireless network access point used by the wireless adapter for connection. The SSID must match exactly the name of the wireless access point. It is case sensitive. When you configure a wireless network that was selected from the Wireless Networks list, the SSID is taken from the wireless network list. You cannot and should not change it. Blank SSID: If the wireless adapter receives a blank network name (SSID) from a stealth access point, <SSID not broadcast> is displayed in the Wireless Networks list. Provide the actual SSID for the access point. After connection both the blank SSID and the associated SSID can be viewed in the available networks list. |
|
Network (Infrastructure): Connect to an access point. An infrastructure network consists of one or more access points and one or more computers with wireless adapters. This connection is the type used in home networks, corporate networks, hotels, and other areas that provide access to the network and/or the internet. Device to Device (ad hoc): Connect directly to other computers in an ad hoc wireless network. This type of connection is useful for connections between two or more computers only. It does not provide access to network resources or the internet. |
|
Advanced |
Click Advanced to access the Advanced Settings. The Advanced Settings allows you to set auto-connect or auto-import options, launch an application, set a profile password or specify a certain access point address for adapter connection (Mandatory access point). Refer to Advanced Settings for more information. |
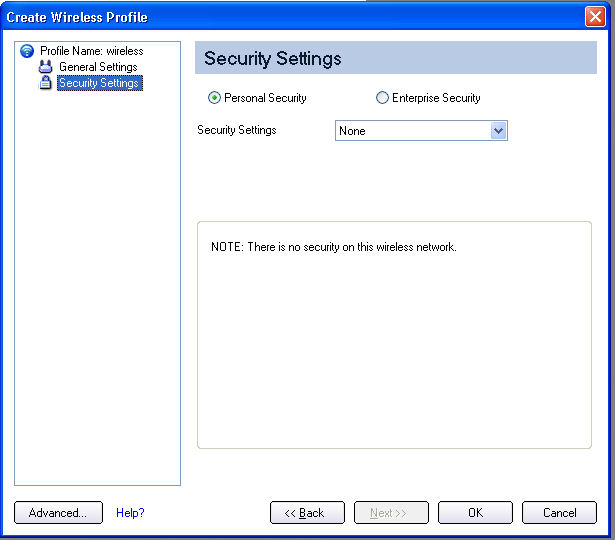
Next |
Proceeds to the Security Settings page. |
OK |
Finishes creation of the new profile with the current settings. |
Cancel |
Closes the Profile Wizard and cancel any changes. |
Help? |
Provides help information for this page. |

Name |
Description |
Automatic (Default): Select to have Intel PROSet/Wireless automatically connect to this profile when it is in range. On Demand: Select to prevent automatic connection of a profile when the network is in range. For example, if there is a cost for a wireless connection and you did not want to connect automatically when in range. To connect to the network:
|
|
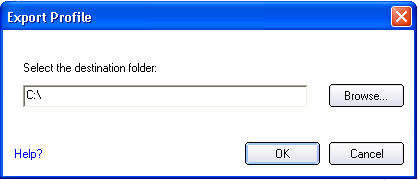
Allows a network administrator to easily move the selected profile to other computers. When the exported file is placed in the Wireless\AutoImport directory on another computer, Intel PROSet/Wireless automatically imports the profile. |
|
Mandatory Access Point: Forces the wireless adapter to connect to an access point that uses a specific MAC address. Type the MAC address of the access point (BSSID); 48-bit 12 hexadecimal digits. For example, 00:06:25:0E:9D:84. This feature is not available when ad hoc operating mode is used. Clear: Clear current address. |
|
|
|
Automatically starts a batch file, executable file, or script whenever you connect to the profile. For example, start a Virtual Private Network (VPN) session automatically whenever you connect to a wireless network.
|
|
OK |
Close and save the settings. |
Cancel |
Close and cancel any changes. |
Help? |
Help information for this page. |
To edit an existing profile:
To remove a profile:
If you are still connected to the network:
To password protect an existing profile:
Allows you to export and import user-based profiles to and from the Profiles list. Wireless profiles can be automatically imported into the Profiles list.
NOTE: To export Administrator profiles, refer to Administrator Packages for more information.
To select multiple profiles:
To import profiles manually:
An administrator can set profiles to be imported automatically into the Profiles list. Intel PROSet/Wireless monitors the import folder on your hard disk for new profile files. Only profiles that have been enabled through Enable Auto-Import in the Advanced Settings are automatically imported. If a profile of the same name already exists in the Profiles list, you are notified to either reject the imported profile or accept it. If accepted, the existing profile is replaced.
All imported user-based profiles are placed at the bottom of the Profiles List.
Import and export password-protected user-based profiles automatically to remote systems. If a profile is password protected, the assigned password must be entered before it can be edited. Refer to Set a Profile Password for more information.


